Tuesday 22 December 2009

And some more gingerbread

The baking marathon continues......I made some more gingerbread hearts and mini men today as a Christmas gift for some friends. I took the opportunity to practice my piping skills by decorating the cookies with piped lines, dots and simple designs. Here's how they turned out...


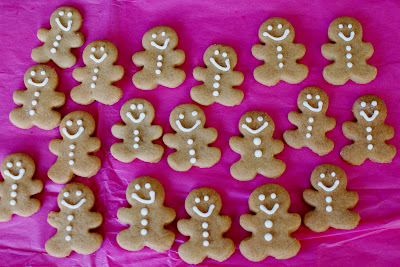
I had a lot of fun staging a Christmas scene with the mini gingerbread men around my little Christmas tree.......they are just so cute :)

Merry Christmas!!

Sunday 20 December 2009

Gingerbread House

Yesterday I made my first gingerbread house. I found some great templates on Gingerbread House Heaven for castles and victorian mansion gingerbread constructions but decided to stick with a simple elf house this time. After assembling the house with royal icing, I decorated it with a selection of lollies and gingerbread biscuits I made. Finally, I put a Lindt chocolate santa at the entrance. I was pretty happy with the way it turned out....

Thursday 17 December 2009

More Gingerbread

I've been on a gingerbread baking spree over the past few days. Here are some simple cookies I made for my work colleagues. I used snowflake, reindeer and heart cookie cutters, then decorated the cookies with piped royal icing.


If you want to make some, here is the recipe. They are really simple to make!

Gingerbread (makes about 24 cookies)

Ingredients
  • 125g unsalted butter (softened)
  • 1/2 cup dark brown sugar (~110g)
  • 2 1/2 cups of plain flour
  • 1 egg yolk
  • 1 tsp bicarbonate of soda
  • 3 tsp ground ginger
  • 1 tsp mixed spice
  • 1/2 cup golden syrup

Method

Preheat the oven to 160C (fan forced). Beat butter, dark brown sugar and egg yolk in a bowl with an electric hand mixer until smooth and all ingredients are well combined. Stir in golden syrup, sifted flour, biocarbonate of soda, ginger and mixed spice in two batches to ensure all ingredients are mixed together properly. If the dough is slightly crumbly, add a little more golden syrup.

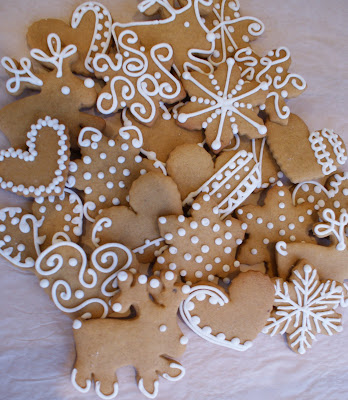
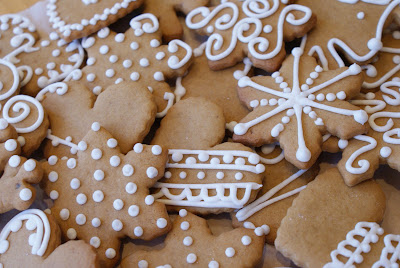
Knead the dough on a floured surface then roll it out to approximately 5mm in thickness. Use cookie cutters to cut out shapes, then transfer cookies to lined baking trays. The cookies do not spread too much during baking, however it is best to ensure the cookies are evenly spaced on the tray. Bake thems for about 15 minutes until they are light brown in colour, before placing them on wire racks to cool. Cookies will harden once cool and can be stored in an airtight container for up to 3 months. Decorate with royal icing if desired.

Happy baking x

Sunday 13 December 2009

Gingerbread Wreath

I love gingerbread - it's possibly my favourite food and over the next few weeks I plan to make a ton of it for Christmas. Here's a Christmas wreath I made by joining gingerbread men in a ring. To make your own, join the hands and feet of the gingerbread men together with water before baking.


Stay tuned for more gingerbread creations!

Thursday 10 December 2009

Christmas Pudding Cake Balls

I made a chocolate cake recently which didn't rise properly, so I decided to turn it into cake balls. They are a great way of turning a potential disaster into something lovely. To make a cake ball, crumble up a cake, then mix buttercream or your choice of frosting through the cake crumbs to help them stick together. Roll little balls of cake then leave them to set in the fridge on a lined baking tray. You can dip them in melted chocolate, or roll them in sprinkles, whatever takes your fancy.

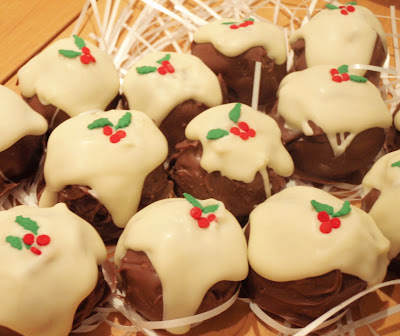
I dipped mine in white and dark chocolate to make little christmas puddings then decorated them with holly sprinkles. Yum!

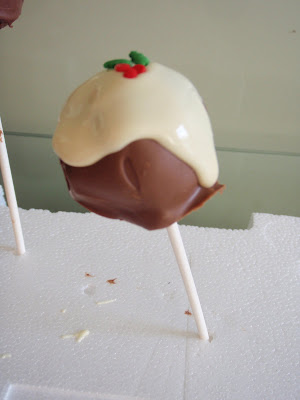
And here's one on a stick - a pudding pop!

Happy baking!

Monday 7 December 2009

Ironcupcake London - December Entry

Tonight was the last round of Ironcupcake London for the year. The theme for this month was 'Christmas' and there were 46 amazing entries - the largest number of entries to date. Everyone went to so much effort - the flavours and decorations were all superb. Here are some photos I took of the night:


So many cupcakes to try!!!

My entry was Spiced Eggnog Cupcakes with Bourbon Buttercream

Here's how to make them:

Ingredients

Eggnog
  • 2 large eggs (separated)
  • 75g caster sugar
  • 100ml bourbon
  • 200ml full cream milk
  • 150ml whipping cream
  • 1 tsp ground nutmeg

Cupcakes

  • 1 1/2 cups caster sugar
  • 115g unsalted butter (at room temperature)
  • 3 eggs
  • 1 tsp vanilla essence
  • 3/4 cup eggnog
  • 1/4 cup bourbon
  • 2 1/4 cups plain flour
  • 1 tsp baking powder
  • 1 tsp baking soda
  • 1 tsp ground cinnamon
  • 1/2 tsp all spice
  • 1/4 tsp ground nutmeg

Bourbon Buttercream

  • 2 tbs brown sugar
  • 2 tbs whipping cream
  • 1 tbs unsalted butter
  • pinch salt
  • 3 tbs bourbon
  • 250g unsalted butter (softened)
  • 500g icing sugar

Method

Start by making the eggnog. Whisk egg yolks and caster sugar with an electric beater until the mixture is pale and fluffy. Whisk in boubon gradually and then add the milk. In a separate bowl, beat the egg whites until soft peaks form, then fold it into the egg yolk mixture. In a separate bowl, whip the cream until soft peaks form then fold it into the mixture. Stir the nutmeg through the mixture then leave in the fridge until needed.

To make the cupcakes, preheat the oven to 175C. Beat caster sugar and butter together until light and fluffy using an electic mixer. Then beat in the eggs until well combined. In a separate bowl, mix eggnog, boubon and vanilla together. In another bowl, mix flour, baking powder, baking soda, cinnamon, all spice and nutmeg. Alternate adding dry ingredients and wet ingredients into the egg mixture until the all combined. Spoon mixture into lined cupcake tins (only fill about 1/2 of the cup) and bake for 20-25 mins. Once cooked, leave the cupcakes to cool completely on a wire rack.

To make the bourbon buttercream, whisk brown sugar, cream, 1 tbs unsalted butter and salt in a saucepan over a medium heat until the sugar is dissolved. Pour in bourbon and stir to combine, then remove sauce from heat and allow to cool. Using an electric mixer beat 250g unsalted butter until soft and fluffy then gradually add icing sugar, ensuring it is mixed in well after each addition. Stir through bourbon caramel sauce.

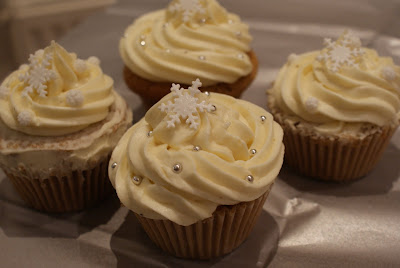
Once the cupcakes have completely cooled, frost them with the buttercream and decorate as desired. I used edible silver balls and sugarpaste snowflakes I made in advance.

Enjoy xx

Sunday 6 December 2009

National Cookie Challenge - November Entry

The theme for the November round of the National Cookie Network Baking Challenge was cranberries, so I attempted to turn my favourite cocktail - Vodka, Cranberry and Lime - into a cookie. Although the cookies may not look as exciting as a cocktail, they taste delicious, and are super easy to make.


Here's the recipe if you want to have a go at making them:

Vodka, Cranberry and Lime Cookies

Ingredients (makes 20 large or 35 small cookies)
  • 265g softened unsalted butter
  • 1 cup icing sugar (sifted)
  • 1 1/2 cups plain flour
  • 175g dried cranberries
  • zest and juice from 1 lime
  • 1/2 cup vodka

Method

Preheat oven to 175C. Pour vodka into a bowl and add cranberries. Allow them to soak until all the vodka has been absorbed. In the meantime, using an electric mixer, beat butter and icing sugar together until smooth and fluffy. Add flour and continue mixing until the dough is formed. Sitr in zest and juice of lime and vodka soaked cranberries. Place small balls of mixture onto lined baking trays, then bake for about 10 mins until they are just start to turn golden. Cool on wire racks (cookies harden when cool), and store in an airtight container to retain freshness.

Happy Baking x

Friday 4 December 2009

Baby Shower

On Saturday I attended a friend's babyshower and put together a cupcake tower for the celebration. I made a selection of 24 large and 48 small vanilla cupcakes and frosted them with rosewater buttercream. I kept the decorations relatively simple, using pink glitter, and handmade sugarpaste flowers, rattles, bottles, dummies and 'S' monographs. The top of the tower had a 6" cake complete with a handmade mini version of the pregnant guest of honour sitting on the edge of the cake. This is the first time I've modelled with sugarpaste before and I was quite pleased with the way it all turned out.